 Save to Pinterest
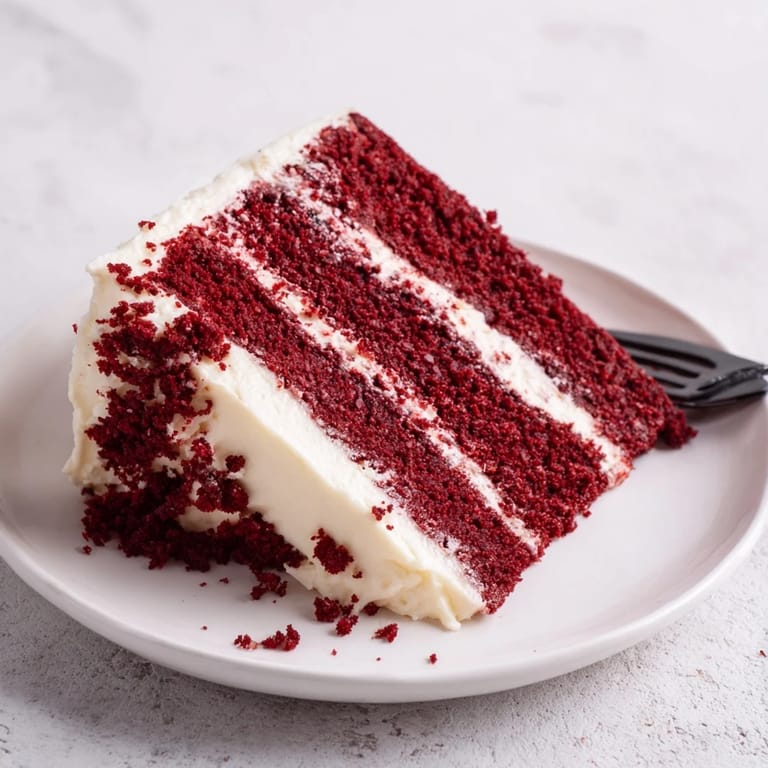
 My grandmother kept a faded index card with this recipe tucked inside her metal recipe box, the corners softened from years of handling. She made it for every birthday, every church gathering, every Tuesday that needed celebrating. The first time I attempted it alone, I accidentally used double the food coloring and ended up with a cake so vibrant it looked like something from a cartoon. Everyone still talked about how delicious it was, even through their stained smiles.
I once made three of these cakes in one weekend for my cousin's wedding shower, learning that cream cheese frosting behaves differently depending on humidity. The kitchen smelled like vanilla and happiness for days. One cake traveled forty miles wrapped carefully in towels, arriving looking as gorgeous as it had when it left my oven.
Ingredients
- 2 ½ cups all purpose flour: Sift this twice to prevent any lumps in your velvet smooth crumb
- 2 tablespoons unsweetened cocoa powder: This subtle amount gives depth without overpowering the delicate red velvet flavor
- 1 teaspoon baking soda: The leavening agent that creates those tender tall layers
- ½ teaspoon salt: Enhances all the flavors and balances the sweetness
- 1 ½ cups granulated sugar: Cream this thoroughly with butter for the perfect tender crumb structure
- 1 cup unsalted butter softened: Room temperature butter incorporates properly creating that luxurious texture
- 2 large eggs room temperature: Cold eggs can cause your batter to separate so let them sit out first
- 1 cup buttermilk room temperature: The secret ingredient that adds moisture and that characteristic tang
- 2 teaspoons vanilla extract: Use pure vanilla for the best background flavor
- 1 teaspoon white vinegar: Reacts with buttermilk to enhance the red color and tenderness
- 1 ounce red food coloring: Gel coloring gives deeper red without adding liquid
- ½ cup vegetable oil: Keeps the cake exceptionally moist while butter provides flavor
- 8 ounces cream cheese softened: Use full fat block cream cheese not whipped for the best frosting consistency
- ½ cup unsalted butter softened: Room temperature butter blends seamlessly into the frosting
- 4 cups powdered sugar sifted: Sifting prevents lumpy frosting and ensures silky smooth texture
- 1 teaspoon vanilla extract: Rounds out the frosting flavor beautifully
- Pinch of salt: Balances the sweetness of the frosting
Tired of Takeout? 🥡
Get 10 meals you can make faster than delivery arrives. Seriously.
One email. No spam. Unsubscribe anytime.
Instructions
- Preheat your oven and prepare pans:
- Set your oven to 350°F and generously grease two 9 inch round pans with butter then dust with flour tapping out any excess
- Combine dry ingredients:
- In a medium bowl sift together the flour cocoa powder baking soda and salt until everything is well blended
- Cream butter and sugar:
- Beat the sugar and softened butter in a large bowl until the mixture turns pale and fluffy about 3 minutes
- Add eggs and flavorings:
- Add eggs one at a time beating thoroughly after each then mix in the oil vanilla extract and vinegar
- Create the red mixture:
- Whisk the buttermilk and food coloring together in a small bowl until fully combined
- Combine everything:
- Add the dry ingredients to the wet mixture in three parts alternating with the buttermilk mixture beginning and ending with dry ingredients mixing just until combined
- Bake the layers:
- Divide the batter evenly between the prepared pans and bake for 28 to 30 minutes until a toothpick inserted in the center comes out clean
- Cool completely:
- Let the cakes cool in their pans for 10 minutes then turn them out onto wire racks to cool completely before frosting
- Make the frosting:
- Beat the cream cheese and butter together until smooth then gradually add the powdered sugar vanilla and salt beating until light and fluffy
- Frost the cake:
- Once cakes are completely cool spread a layer of frosting between the layers then frost the top and sides of the cake
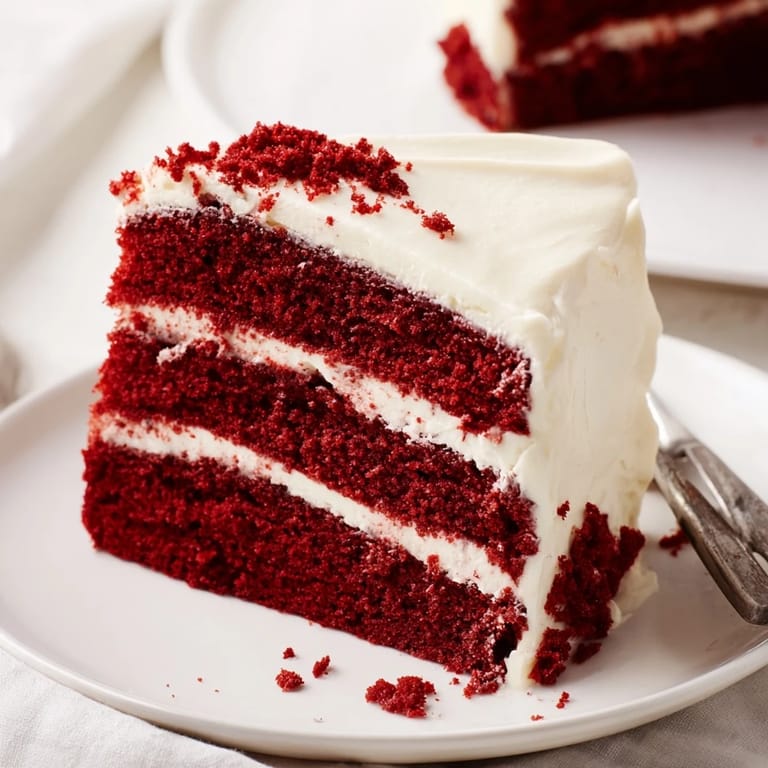
 Save to Pinterest
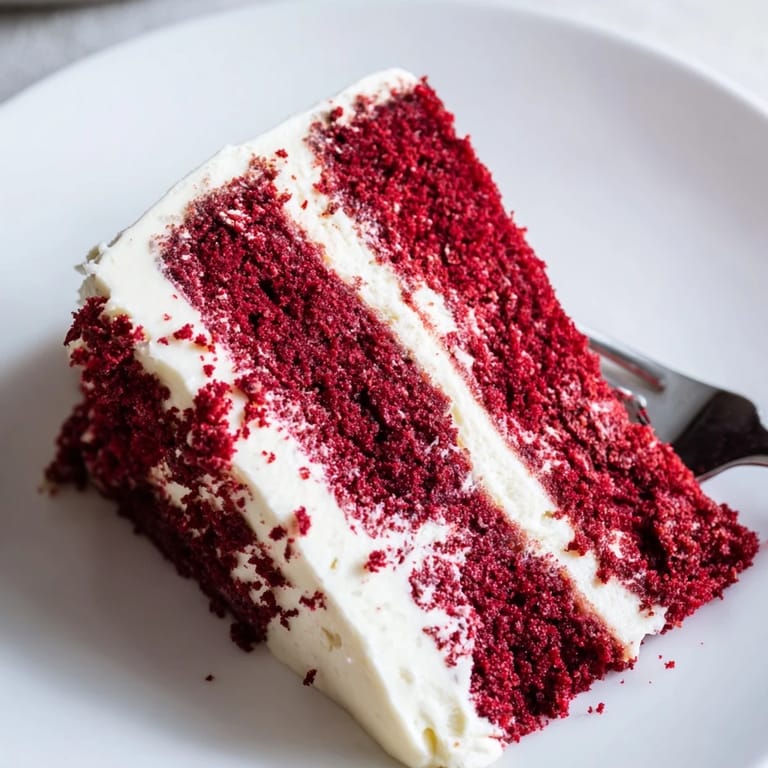
 My friend Sarah requested this cake for her birthday three years running, and the third year she asked if she could come over and learn to make it herself. We spent a Sunday afternoon in my kitchen, her two kids covered in red food coloring and flour, teaching them that the best celebrations are the ones you make with your own hands.
Getting That Perfect Red Color
The interaction between the acidic buttermilk and vinegar plus the natural cocoa creates a subtle red tint on its own, but the food coloring gives us that dramatic hue we associate with red velvet. Gel food coloring is more concentrated than liquid so you need less to achieve the same intensity. I once tried using beet juice for a natural version and while it worked, the color was more of a deep magenta than the classic bright red.
Making The Frosting Work For You
Cream cheese frosting can be finicky because cream cheese softens quickly at room temperature. Keep your ingredients cool but not refrigerator cold for the best texture. If your frosting becomes too soft while decorating, pop the whole cake in the refrigerator for 15 minutes to firm things up again. The frosting should be spreadable but hold its shape when you lift your spatula.
Storage And Serving Tips
This cake actually tastes better on day two as the flavors have time to meld together and the moisture redistributes throughout the crumb. Keep it refrigerated because of the cream cheese frosting but bring it to room temperature about 30 minutes before serving for the best texture and flavor. The cold dulls the sweetness and makes the crumb feel denser than it really is.
- Slice with a sharp knife dipped in hot water and wiped clean between cuts for perfect slices
- Press cake crumbs gently into the sides of the frosted cake for a professional bakery finish
- Serve this cake slightly chilled on warm days for the most refreshing experience
 Save to Pinterest
 Whether you are celebrating something big or just making Tuesday feel special, this cake has a way of making ordinary moments feel like occasions worth remembering.
Recipe FAQs
- → Why is red velvet cake called red velvet?
The name comes from the velvety texture created by the chemical reaction between buttermilk and vinegar, which traditionally gave the cake a subtle reddish hue. Modern versions use food coloring to achieve that signature deep red color.
- → Can I make red velvet cake ahead of time?
Yes! The layers can be baked and wrapped tightly in plastic for up to 2 days before frosting. The unfrosted cake can also be frozen for up to 3 months. Once frosted, it keeps well in the refrigerator for up to 5 days.
- → What gives red velvet its distinctive flavor?
The unique taste comes from the combination of cocoa powder, buttermilk, and a touch of vinegar. This creates a subtle tanginess that balances the sweetness and complements the rich cream cheese frosting perfectly.
- → Is gel food coloring better than liquid?
Gel food coloring typically produces a deeper, more vibrant red color without adding excess liquid to the batter. It's more concentrated, so you need less product to achieve that signature hue.
- → Can I use natural red food coloring?
Yes, beet juice or pomegranate juice can provide natural red coloring, though the result may be more subtle. Keep in mind that natural options might alter the flavor slightly and produce a softer red tone.
- → Why must the cakes cool completely before frosting?
Warm cake layers will cause the cream cheese frosting to melt and slide off. Allowing the cakes to cool completely ensures the frosting stays in place and maintains its fluffy, stable texture.